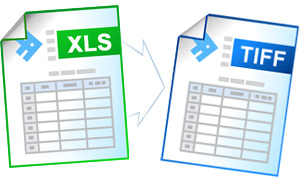
Convert Excel to TIFF
Although Excel seems to be more practical and handier in use, conversion from Excel to TIFF is a pretty frequent necessity. The TIFF format is widely used in faxing, scanning and other documentary exchange processing. It does not allow making any calculations, but it does allow showing their results without referring you to the outside resources. Universal Document Converter can automate the Excel to TIFF conversion with only a few clicks.
On this page:
- How to save Excel as TIFF?
- Transfer a whole worksheet onto a single TIF file page
- Watermarking the Excel document
- Convert Excel to TIFF in batch mode
- Automatic Excel to TIFF conversion in the office
- Excel to TIFF conversion code examples for developers
How to Save Excel as TIFF
Universal Document Converter will help you convert your Excel files to TIFF. Acting as a virtual printer it will place your Excel document into a specific folder and will then convert it to TIFF.
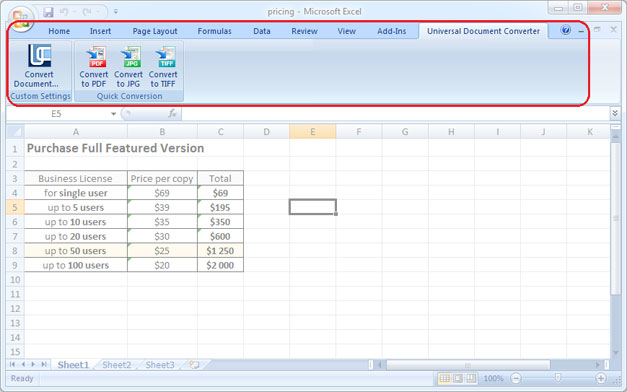
Saving Excel as TIFF becomes even easier with the help of the “hot buttons”. The “hot buttons” are contained within the toolbar of the Universal Document Converter built-in in the Microsoft Excel main window. Saving your Excel document as a TIFF file can be possible with only a couple of clicks: go to the toolbar of the Universal Document Converter and press one of the three buttons: Convert to PDF, Convert to JPG or Convert to TIFF.
Transfer a Whole Worksheet onto a Single TIF File Page
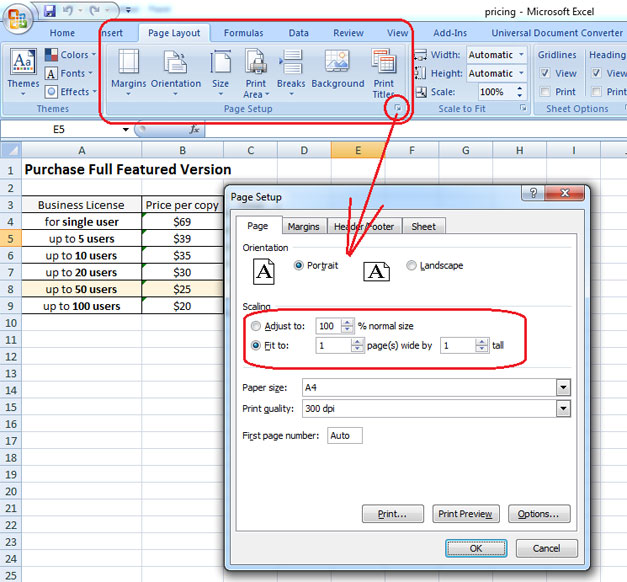
In case you need to insert a sheet or a diagram into a single TIF image file, please do following:
- Open Page Layout toolbar in Microsoft Excel and click to bottom-right corner of it
- Select Fit to 1 page wide by 1 tall feature like shown on the screenshot below
- Click OK and print Excel file in TIF using Universal Document Converter as a printer.
Watermarking the Excel Document
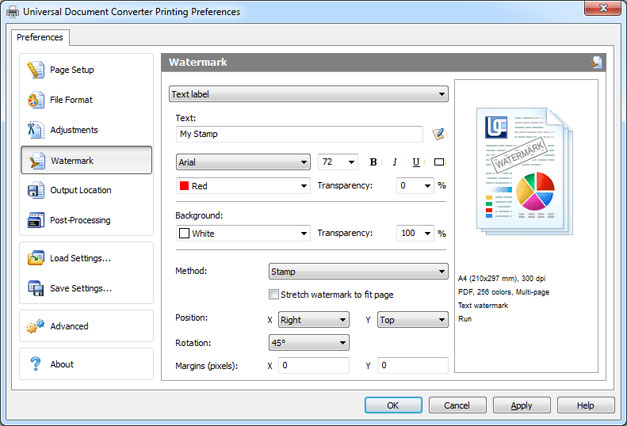
Placing a watermark on the Excel document may be necessary when the document is confidential. To place a watermark please do the following:
- Open the document in Microsoft Excel and click Print
- Select Universal Document Converter printer and click Properties
- Choose TIFF Image as an output file format
- Go to the Watermark menu and select Text label or Picture. Introduce the desired settings.
- Click OK to start the conversion process of Excel into TIFF.
Convert Excel to TIFF in Batch Mode
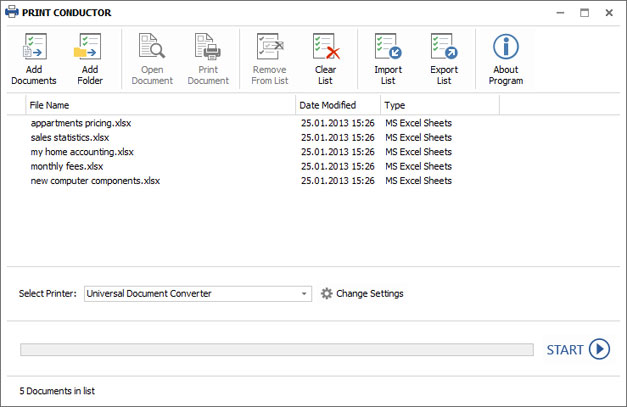
Automatic conversion from Excel to TIFF is possible by means of three programs: Microsoft Excel, Universal Document Converter, and Print Conductor.
- Start Print Conductor and add your Excel files to the list of files to be processed
- Select Universal Document Converter from the list of printers and click Change Settings
- Specify TIFF Image as the type of the output file in the settings and click OK
- Press Start to begin converting Excel to TIFF in batch mode.
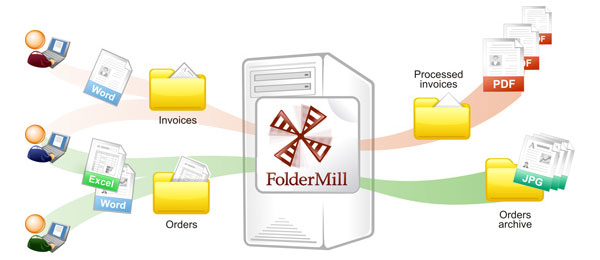
Automatic Excel to TIFF Conversion in the Office
Documents received by the company employees from outside computers may or may not correspond to the preferences of the company employees. For example, if you prefer to keep the diagrams and charts in the TIFF format instead of Excel, you can set their automatic conversion. Setting automatic conversion from Excel to TIFF can be possible with the help of the Folder Mill software. The program will help you follow the instructions given for the incoming files: the incoming files will be placed into one specific folder, and the resulting files can be received from another one.
Excel to TIFF Conversion Code Examples for Developers
The Universal Document Converter package includes a public API and code examples that software developers can utilize for the projects similar to the ones of the Universal Document Converter. Take a look at the code examples that will help you convert Excel to TIFF in different programming languages.
Automatic deployment is another useful option that will speed up the Universal Document Converter installation process on a large number of workstations.
Related conversion tutorials:
-

John Haddock
USA
«Universal Document Converter is perfect for converting Word and PowerPoint documents into high quality JPEG images or well-compressed PDF files.»